MitM
If you want to view, modify, or execute scripts for HTTPS requests, you must enable the MitM feature. Before enabling the MitM feature, your device needs to trust the self-signed CA certificate, which can be imported by the user into Stash or generated by Stash.
⚠️
For data security and privacy reasons, you should never share certificates with others or use CA certificates provided on the Internet.

Configuring MitM using configuration files
Configuring the CA certificate
http:
  # CA certificate encoded in PKCS #12 format
  ca: ''
  # Certificate passphrase
  ca-passphrase: ''
  # List of domain names to enable MitM for, ensuring that the above CA certificate is trusted by the system
Configuring the MitM list
http:
  # List of domain names to enable MitM for, ensuring that the above CA certificate is trusted by the system
  mitm:
    - g.cn
    - '*.google.cn'
    - weather-data.apple.com # Only enabled for port 443 by default
    - weather-data.apple.com:* # Enable for all ports using wildcard
    - '*.weather-data.apple.com' # Wildcards can also be used in domain names
MitM configuration is now complete.
Configuring MitM using the graphical interface
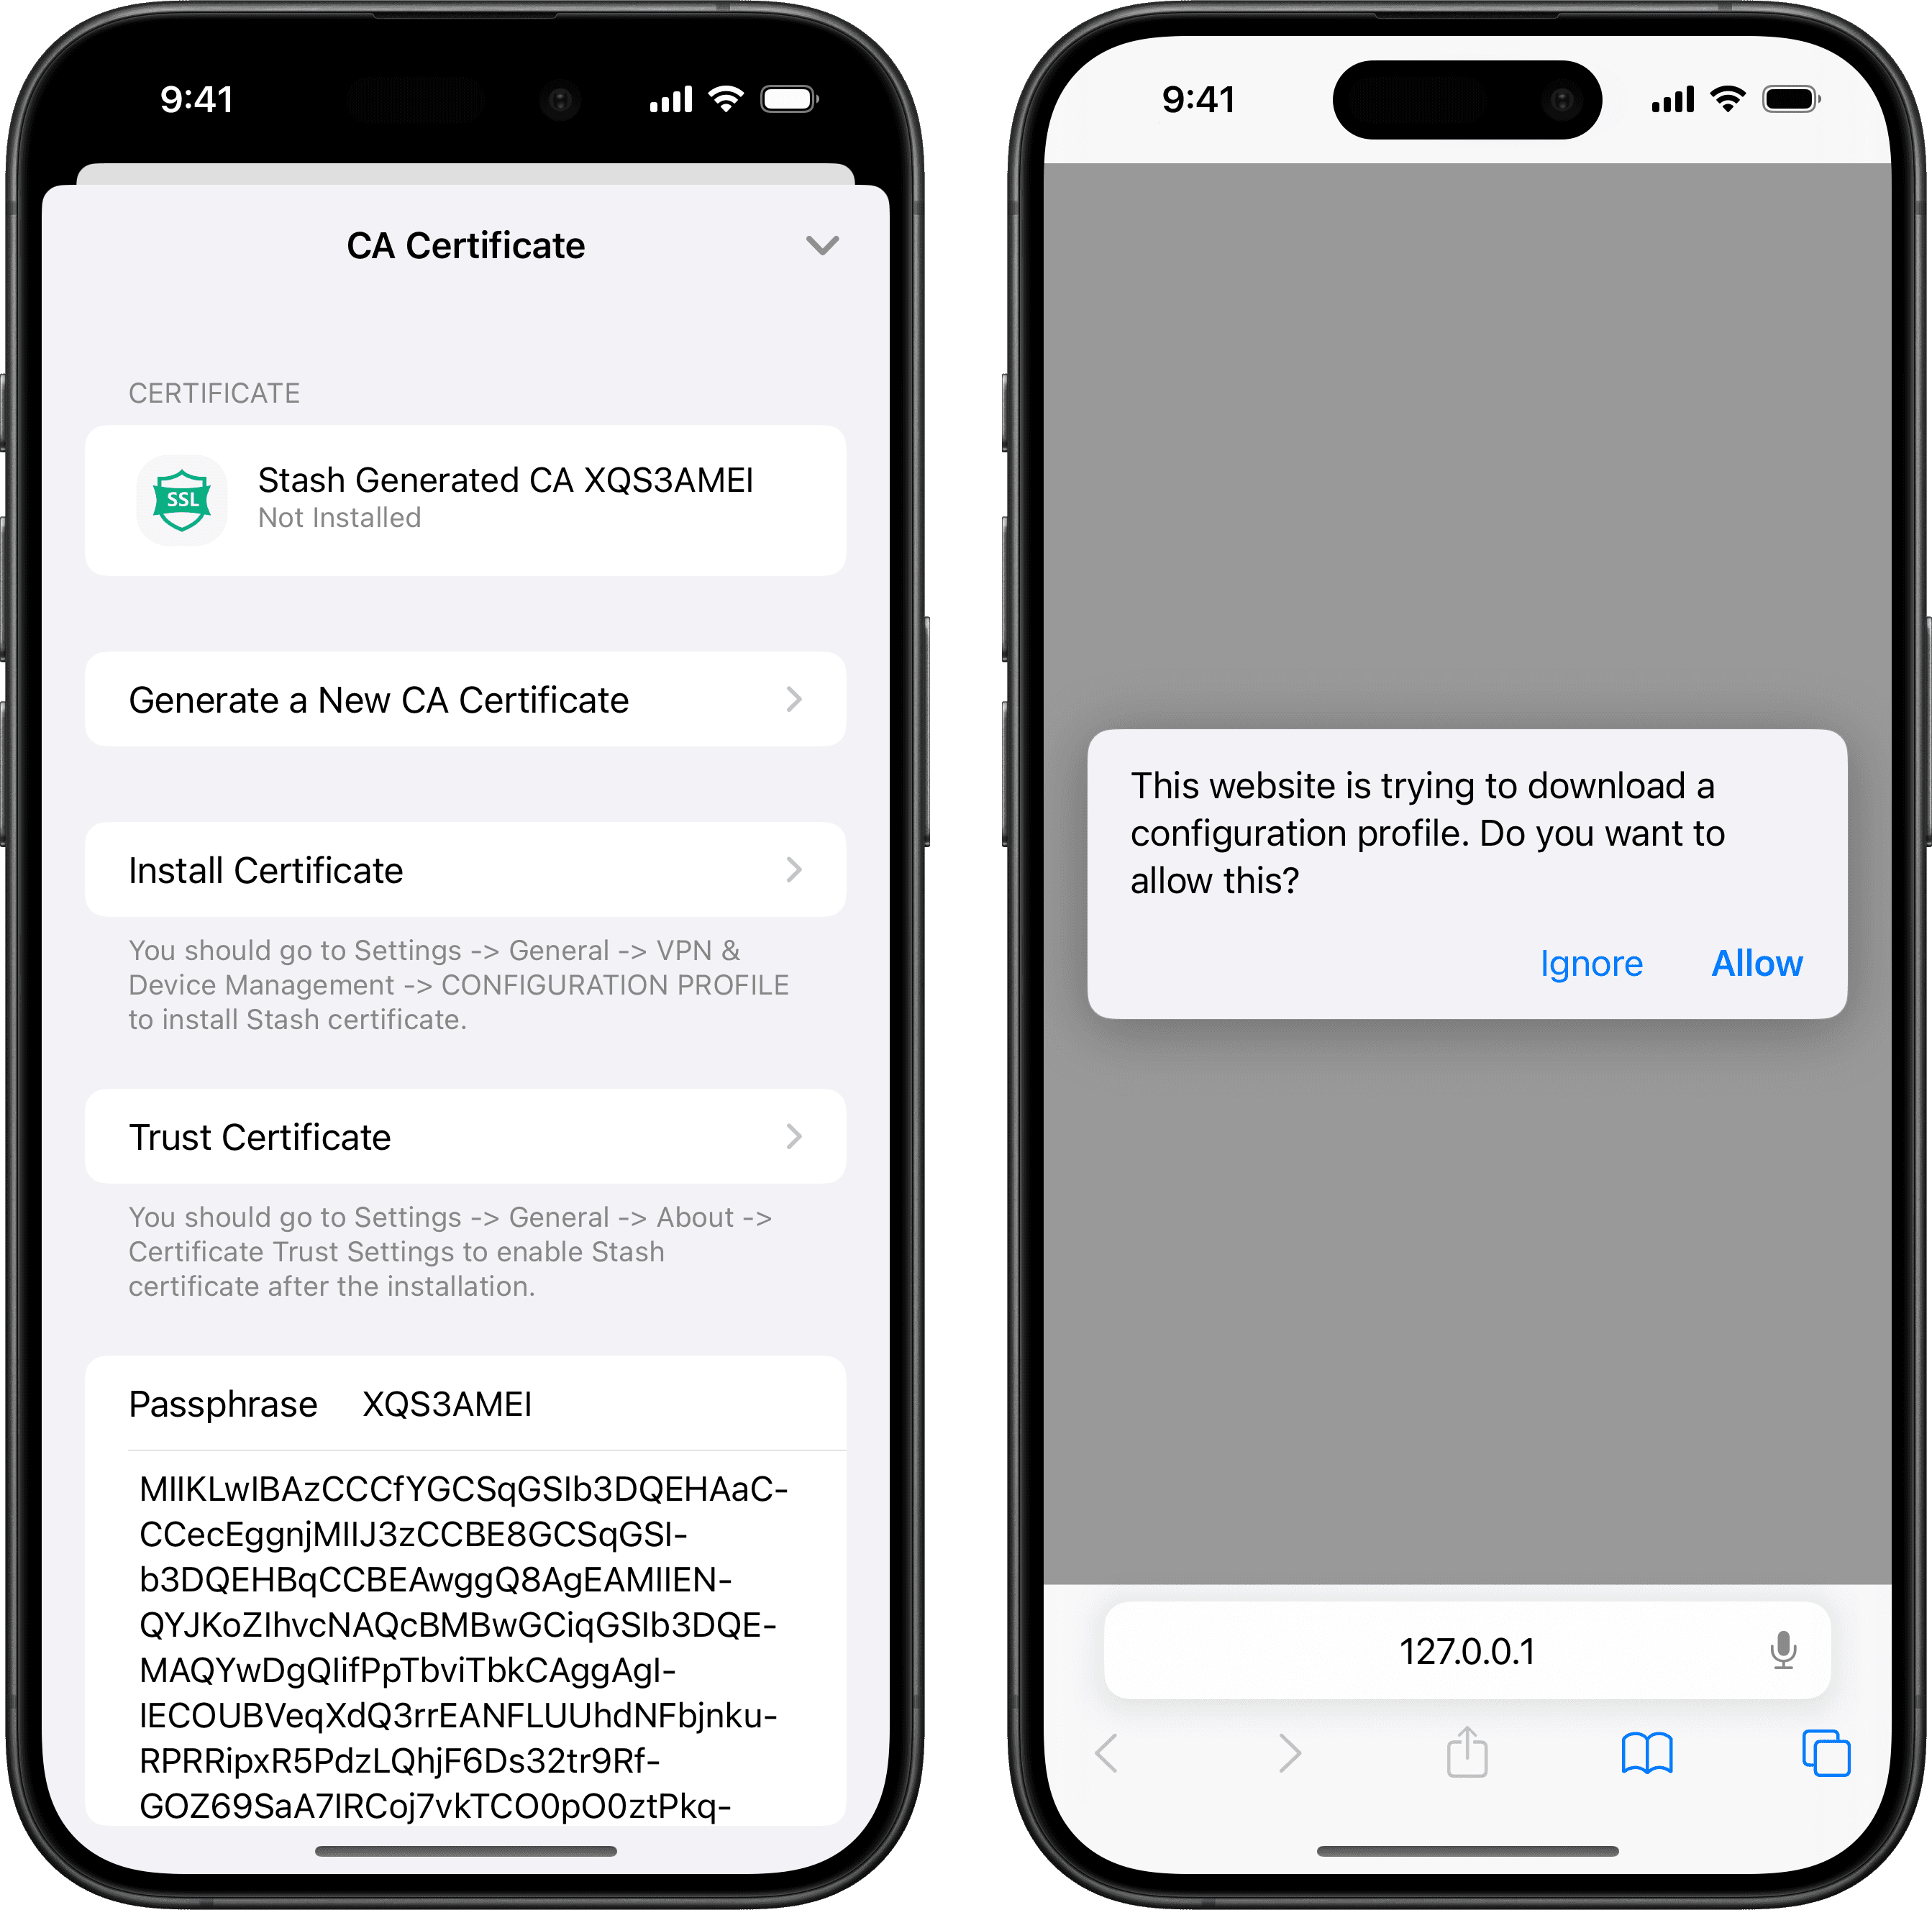
If you are unable to add the CA certificate in the configuration file, you can use the graphical interface of Stash to generate the CA certificate.
Configuring the CA certificate
- On the Stash homepage, go to MitM and select [CA Certificate].
- Click on [Stash Generated CA] to generate a new certificate.
- Click on [Install Certificate] to install the new certificate.
- Stash will automatically redirect to Safari for certificate installation. Click on [Allow] to install the new certificate.
- If you see [Profile Downloaded], it means the certificate has been successfully installed.
Configuring the MitM list
- On the Stash homepage, go to MitM and select [Hostname].
- Enter the domain name you want to add, such as *.google.cn. Wildcards can be used in domain names. Click on the [+] button next to it to add it to the MitM list.